Building a Reliable Block Retaining Wall
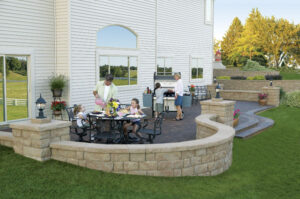
Retaining walls serve a different purpose than outdoor freestanding walls—they're not built to fence in an area or to mark property but to aid in landscaping, holding back soil to fight erosion and let you reshape slopes. Whether it's for aesthetic purposes or to make sloped land usable for garden beds and outdoor spaces, a retaining wall is a valuable landscaping tool when used properly. With retaining wall blocks, it's also easy to make a DIY project of it—perfect for homeowners that want to take their landscape into their own hands. There's much to consider in designing and constructing a retaining wall, though, from aesthetics and material choice to managing water runoff and the weight of the retained soil.
Design Considerations
Fundamentally, retaining walls are built to hold back soil, and the weight of that soil puts tremendous pressure on the wall. Your wall won't be holding up an entire hillside, just the wedge of soil between itself and what is called the "failure plane"—the steepest slope that existing soil can naturally form before it collapses under its own weight. Driven by gravity, this wedge pushes against the retaining wall, with the pressure concentrated at the base.
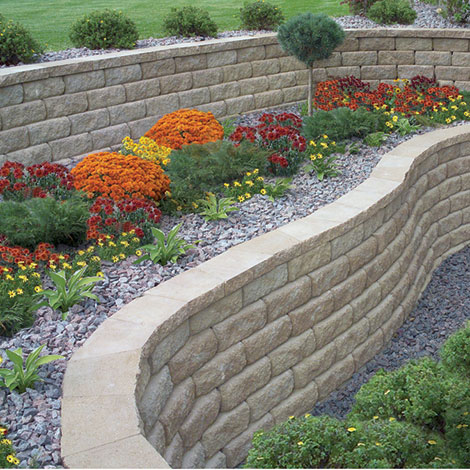
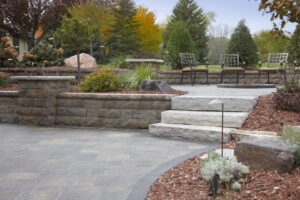
Garden walls and short retaining walls made from stacked stone or concrete wall blocks can stand on their own when built correctly, using their own weight as well as friction between the wall and base and an interlocking block system to push back against soil. Large scale retaining walls—over 4 feet tall—need additional supports, and most municipalities require a building permit and input from a certified engineer before you can start constructing such a wall, so they're generally outside the scope of a DIY project. If you need to retain a greater slope, you can use multiple tiers of walls—not only does this create a distinctive terrace-like appearance, each individual wall has less pressure against it. As a rule of thumb, separate these tiers with distance twice that of the walls' height.
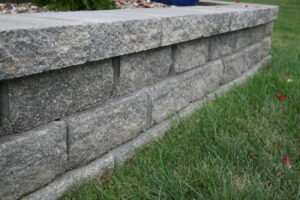
To make the wall as stable as possible, retaining wall blocks should have a well-compacted base for the lowest course (row of blocks) to rest on and be laid out with each course staggered from the one below. Also, two features are used to counteract the concentration of pressure at the base: the first course is buried partially by compacted soil to keep it from being pushed out and the blocks are stepped back so that the wall as a whole leans against the retained soil. Proper drainage is also vital, as groundwater getting trapped behind the wall adds extra weight against it. To aid in draining groundwater, be sure to install a drain pipe at the base and use gravel as backfilling behind the wall, since it drains more effectively.
Materials To Use
The most apparent material you'll need for your retaining wall is the blocks that make up the wall itself. A retaining block can come in a variety of shapes and compositions. Concrete wall blocks are common and reliable, not to mention they usually come ideally shaped for building retaining walls, but natural stone is a good choice for those who find concrete to look too artificial. If you choose natural stone, you best bet is to use quarried stone that has been cut at the quarry to be more easily stacked; "rubble" or "boulder" walls using irregular stacked stones are tricky to assemble in a stable structure. Additionally, retaining wall blocks usually interlock to improve stability. This is done either with lips and grooves in each block or with slots through which pins are inserted to anchor blocks to each other.
Along with the blocks, you'll need some other materials to help bring it all together. A compacted base material, either sand or gravel, is vital for the foundation. Additional gravel should be used for backfilling in place of native soil to keep it from collapsing and to improve drainage, and landscaping fabric laid between the backfilling and recompacted topsoil further aids in draining groundwater by keeping the soil from slipping into the gravel.
Key tools include a flat blade shovel, a hand tamper or vibrating plate compactor for compacting soil, stonecutting tools such as a diamond blade circular saw or a hammer and chisel, and a bubble or laser level and a set of stakes with string to ensure each course is level. Safety gloves and goggles are recommended, along with a dust mask while cutting, and a back brace can help with lifting heavy blocks.
Guidelines For Construction
The actual process of constructing a wall from retaining blocks can be done over the course of a weekend. To make sure everything goes as planned, here are some tips:
- Double check to ensure that you won't run into any utilities while digging the trench.
- To have level blocks, you need a level base. Flatten and level the underlying soil before laying sand or gravel, using the shovel or a level object like a 2-by-4 to scrape off extra soil. After that, about an inch of sand or gravel works for the base. Jiggling the first blocks a little when setting them in the base can help level them while also anchoring them in place.
- Spot-check regularly as you lay blocks to make sure they're level with each other. You may need to brush away loose dust, dirt or debris to make sure that further courses also lay level. Even a slight error in leveling at the base transfers upwards, destabilizing the entire wall.
- Check the level of an entire course by running string between two stakes or posts at either end.
- If you don't want to buy specially shaped corner or end blocks, you can use a chisel or diamond saw to cut blocks in half in order to maintain the staggered block system.
- Add small amounts of backfill at a time to let it settle and avoid creating gaps that can later collapse. As with setting the first bricks in the base material, jiggling the wall occasionally can help settle the backfill before compacting it.
With due diligence and the right equipment and materials, you can construct retaining walls on your own for DIY landscaping projects. Create terraces or gardens to liven up your backyard, protect your home's foundation from runoff and erosion or add a rustic touch to the scene, all without needing a professional engineer.
Your Guide to Building a Strong Retaining Wall
Retaining walls can serve multiple functions. The most practical function of a garden wall is that it can offer extra support to prevent erosion. You want to battle the lateral force of slope through the design of the wall itself. In addition to a practical purpose, a retaining wall can add value and beauty to your property. You can create a number of different designs to accent your property. Retaining walls are more than simply stacking retaining wall block, however. Here are tips on an easy to install freestanding wall.
Choose Your Wall Blocks
There are different wall blocks that you can choose from. There are pros and cons to the different types of block. For instance, solid landscape blocks are heavier but you can cut them. Whereas hollow blocks are light but cannot be cut. When cut, it exposes the space within. In addition, hollow blocks generally require you to use backfilling.
In addition, some wall blocks are held together with pins, whereas others have a lip on the bottom. The pinned blocks are best for tight curves. The flat bottom is easier to stack, whereas the one with the small lip can wind up chipping. Chipping can weaken your wall.
Get a Building Plan
Not all retaining walls require a building plan or a permit, but some walls do. If your wall is over four feet tall, then you may need a building permit and an engineer to draw up the plans. The engineer can specify the depth and width of the base and how far you should dig for the base. The engineer can also tell you if you need soil reinforcement. Remember that the taller that your wall is, the more crucial it is for you to have a stable wall. Serious injuries could occur if your wall were to collapse. No matter the size of your wall, it does help to have contractors to assist with the plan and build.
Create Your Trench
Your trench should be big enough for the retaining wall block with at least eight inches of space behind it. Excavate enough to bury up to one layer of retaining blocks and up to eight inches of base material. In addition to depth and size, it should also be level. The base material’s first layer needs to be level. If it isn’t, the wall might tip after freeze and thaw cycles.
Make sure that you compact the soil at the bottom of the trench. You can use a hand tamper or a vibrating plate compactor. This is not an optional step! Some people choose to dismiss this step, but it can cause your wall to settle. Hand shovels and excavators can disturb the top inch or two of your soil.
It is also important that you have plenty of drainage between the wall blocks. Once you stack a few rows, you can backfill with rock and then lay down perforated drain tile. You also need to install drain tee fittings and a drain gate. You need to build your drainage system based on how much rainwater you expect. You can always cut one landscape block down for the drain gate. Remember to screw the drain tile parts together so that they don’t pull apart when you lay down more rock.
Use Crushed Stone
Before you build your garden wall, layer crushed stone as the base. This is better than gravel. It provides drainage and will need less compacting than gravel and other base materials. The best size for crushed stone is between half an inch and ¾ of an inch. Do not lay it down over half an inch beyond the final height that you want. This is about as much as it will go down when you use a hand tamper or plate compactor. When you lay the stone, it is basically already compacted.
Level Your Retaining Wall Blocks
When creating a free standing wall or stacked stone wall, your first course of retaining blocks is the most important. Your wall’s structural integrity relies heavily on this lawyer. Make sure that each block is level and even. You can use a rubber or plastic mallet to set the blocks. Use a torpedo level to make sure that it is completely level. This first course should also be as close to the middle of the trench as possible.
To ensure that your wall remains level, make sure to sweep the blocks before you stack them. If there any pebbles on the surface, it can completely throw the wall out of alignment. It leads to a chain reaction with every block above it. Eventually, your top course will have a hump that you could have avoided by sweeping the blocks.
Space Out Your Tiers
If you want a tiered block system, then you are going to want to make sure that each tier is set back enough that the weight and pressure will not destroy the lower levels. You should separate wall tiers by a distance that isn’t less than the twice the height of the wall below it. For instance, if the bottom wall is two feet tall, then the above needs to be at least four feet tall behind it.
Tighten Your joints
The joint between retaining wall blocks have to be as tight as possible. if you have large gaps, then water might be able to seep into the wall. Retaining wall blocks can be prone to chipping if water is allowed to stand within the wall.
Backfill Your Retaining Wall
Once you are finished, you can backfill. You need to compact angular stone as you backfill. You will want to backfill about eight to 10 inches below the top of your capstones. Then, you can fill the rest with topsoil or turf.
It takes design and work to create the perfect retaining wall. You need the right retaining wall blocks, a plan and the best quarried stone. Once you have all of the materials and tools to make it happen, you can create a garden wall that adds value to your property and structural integrity to your landscape.
How To Create a Reliable Retaining Wall
Redesign your landscaping with a beautiful, reliable retaining wall. Learn more about this iconic outdoor feature and how you can construct one your property. Compare materials for your retaining wall blocks and discover why you need materials from Building Products for affordable, environmentally friendly designs.
What Is a Retaining Wall?
A retaining wall is a durable structure that holds back, or retains, soil. There are a variety of reasons to use a wall in your outdoor design. Here are some of the most common reasons to invest in one for your next landscaping project:
- Avoid soil erosion
- Create a layered look
- Improve the stability of your landscaping
- Protect against erosion from irrigation systems
Unlike freestanding walls, retaining walls are primarily used to hold back soil. Freestanding constructions may create a pleasant border or privacy fence, but they won’t protect your property from the effects of soil erosion. You need a sturdy, supported retaining construction to achieve a long-lasting look.
Just because a retaining wall is practical doesn’t mean it can’t be stylish. Quality retaining blocks are durable and come in iconic shapes and colors. Use these blocks to match your existing outdoor structures or to create visual contrast with your landscape design.
What Types of Materials Are Used for a Wall?
There are many materials available to create a durable wall. Compare these common materials for yourself to find out how you can protect your investment and create the optimal outdoor design:
- Quarried stone
- Concrete wall block
- Timber
Stone or concrete retaining walls are far more durable and effective for holding back soil. If you’re using an irrigation system or experience a lot of moisture throughout the year, a timber retaining structure can be susceptible to rotting. Stone is a reliable, beautiful option to protect your property and improve your curb appeal.
Choose natural stone products from Building Products to enjoy a low-maintenance, environmentally friendly alternative. Our diverse range of products includes a surprising range of shapes, styles, textures and colors to create your dream look. Don’t settle for generic concrete or timber, but invest in a wall that will last.
We also use the latest building materials for state-of-the-art construction. Burnished blocks, UV inline sealers and UltraBrick technology creates a unique construction. Ask how the latest materials can create an iconic structure with unique advantages.
What Are the Steps To Building a Retaining Wall?
A retaining wall requires materials, hard work and the right tools. If you’re going to tackle this project on your own, be sure you have everything gathered before you launch this project. Here are the tools and materials you need for an efficient project:
- Safety equipment
- Wheelbarrow
- Hammer and masonry chisel
- Level
- Spade
- Landscape fabric and gravel or sand
- Stone blocks
Start with a clear design. If you aren’t sure how long or high your wall needs to be, it will be difficult to create a safe wall or purchase the correct number of blocks. Your wall should tilt backward as it rises, so be sure to start with enough room between the soil and your wall to allow room for this tilt.
Once you have a clear design measured out, start by preparing the site. Use your spade to level the ground so your wall will have a uniform look. You may want to use a rake or piece of lumber as a screed to level out sandy soil.
Next, add gravel or sand as a base. This will help prevent water from pooling around the base of your retaining wall. Pooled water creates mud and softens the foundation of your wall, which over time can cause it to sag or lean dangerously. The amount of gravel or sand depends on your climate and the potential for water to pool in this area of your yard.
Once you have a foundation of sand or gravel poured and leveled in your construction area, it’s time to start laying retaining wall blocks. Choose an end to start on and lay out your bricks one at a time. Be sure to push down firmly enough to seat your block but not firm enough to push all the gravel or sand out from underneath your construction. Use your level to be sure the block is level in both directions. This can take some time but is an essential step to ensure a long-lasting and secure structure.
Set another block next to the first and continue following the same steps. Always check that blocks are level in both directions and match up nicely with the rest of the blocks. Fine-tune your construction as you go. It may seem like a minor detail, but a crooked bottom layer of blocks can create a crooked, unstable wall. It’s much easier to adjust blocks as you install them rather than attempting to repair a finished wall.
Depending on your type of blocks and the dimensions of your wall, you may need to cut the last block. Some retaining blocks come with a groove on the back to assist this process. Be sure you’re wearing safety glasses and other protective gear before you start. Measure the length of the block you need at the end of the first run of your wall and mark the length on a block. Use your masonry chisel and hammer to cleave the block in two pieces. This may take a few sharp strikes. Cleaving a masonry block can cause small shards to fly, so it’s important to do this in a safe area wearing proper protective gear.
Finally, it’s time to backfill your wall. Use your remaining sand or gravel to backfill the wall. Be sure you don’t leave any empty pockets that could compromise the structure or cause the soil to sink down. Once it’s backfilled sufficiently, fill the remainder with soil.
Where Can I Buy Retaining Wall Blocks?
Your retaining wall is only as good as your materials. For the best retaining wall blocks for a long-lasting structure, shop at Building Products today. Contact us today to explore our blocks, pavers, cast stone and other masonry products. Enjoy affordable prices on leading materials for professional results in your landscape design.
How To Use Blocks To Build Your Retaining Wall
When properties feature sloping land, it often provides beautiful views. If there is a river or lake below, this is even more true. Unfortunately, there is one big caveat. Rainfall quickly begins to wash the soil away. Soil erosion can pollute water sources, disturb gardens, damage the foundations of houses, cause basement leaks and ruin gardens. So, to combat the problem, many homeowners turn to retaining wall blocks.
Building a retaining wall requires patience, skills and the right tools. Even so, it can make a good DIY project for someone who likes to take on a challenge. These steps describe the basic process.
Step One: Get the Proper Tools
Several factors decide the tools you need, such as the type of soil, the size rocks you might encounter and your budget. Here are some of the basic tools to add to your list:
- Retaining wall blocks
- Gravel or sand
- Chisel or masonry
- Flat blade shovel
- Framing hammer or sledgehammer
- Safety glasses
- Level
- Construction gloves
- Lumber
If the soil is too compact or you just want to make your job a little easier, you might need a small trencher. You can also consider using a gas-powered cutoff saw instead of a chisel to cut the blocks if they are very large or the material is not as easy to break apart smoothly with a chisel.
Step Two: Dig a Trench
When you build your retaining wall, it needs a foundation just like any other permanent structure. Digging into the ground and starting the building process within that trench area gives it additional reinforcement from the weight of the compact soil and rocks on either side. It also prevents the wall from falling over after surviving a few freeze-thaw cycles.
The size of the trench depends on the size of the blocks. You should be able to fit at least one level of the blocks, plus another eight inches of space to the rear. When it comes to depth, make room for at least one level of blocks and up to 8 inches of the base material.
Step Three: Prepare the Work Area
After digging the trench, it’s important to flatten the soil. You want to ensure that the area you set the blocks on is level. Don’t leave the calculation of how level or flat it is up to the naked eye. Use a leveler. If the wall is unbalanced, it might start to lean and will eventually fail.
Then, add six to eight inches of sand or gravel. Without this base material, the water turns the foundation of the all into mud. Water certainly collects there anyway, but the gravel and sand prevent the consistency from softening where the rock connects with the soil. Remember to level the sand or gravel as well.
Step Four: Set First Layer of Retaining Wall Blocks
When you lay the first set of blocks, do so using the staggered method. This provides the best structural support. As you lay each block next to each other, use your level to ensure everything lines up perfectly. Not only do the blocks need to be level, but they need to be flat and level relative to each other.
To measure this, place the level on at least two adjoining blocks while deciding if they line up correctly. If you measure just one at a time, they might be individually level but sit at different heights.
Step Five: Double-Check Levelness
After laying each course, check them all again with the level. If possible, assign someone else to do the spot-checking as the work can feel tedious and slows down the process when you do it alone. If you notice one block is off, it might take some time to right the problem, so don’t wait until the last minute.
One method some contractors use is to drive two posts into the ground at either end and then move a string or rope up and down at both sides to create the perfect level height marker. If your retaining wall is curved, this might not work for you.
Step Six: Cut the Blocks for the Ends
Blocks often come with a groove in at least one side. These grooves provide a half-point for you to break or cut the blocks more easily. This is where you will need your safety glasses, a sledgehammer, chisel and a strong pair of hands.
Hold the chisel in place inside the groove, then use the sledgehammer to apply the necessary force to chisel into the block. It might take a few strikes to break the block in two. If your budget allows and you prefer perfect precision, you can use the gas-powered cutoff saw mentioned earlier. Use these half blocks to complete each alternative row that now has a slot for half a block because of the staggered pattern.
Step Seven: Backfill the Wall
Fill the space left behind the wall with sand or gravel. This provides better stability for the wall. Remember not to shovel too much of this in at once or it might not settle correctly. In fact, it might create some empty spaces that have a negative impact on the stability of your retaining wall, increasing the likelihood of failure. You need this material to be as compact as possible.
Also, try not to backfill all the way up to the top of the retaining wall. Ideally, the blocks stick up a few inches overhead. This helps to keep the water and all it carries behind the wall, as intended.
Step Eight: Check the Wall
Over the next few weeks or months, continue to check the wall routinely to see if there is any buckling or leaning. You also want to check the wall after heavy rains and heavy snowfall. By continuing to maintain your retaining walls, you reduce the likelihood of needing to replace them anytime soon.
Note that the materials you use for your retaining wall make a world of difference. Many people use rocks found on their properties, but they might lack the strength or uniform shape to provide stability. Take a look at the retaining wall blocks we offer at Building Products Corp before making a decision.
Choosing the Right Retaining Wall Blocks
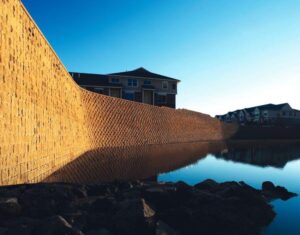
A retaining wall is a freestanding structure built to resist or retain the soil behind it. The wall resists the power of gravity keeping soil from eroding away. The most common reasons people build retaining walls are stability, curb appeal, erosion prevention and aesthetics. Whether it is surrounding a corporate campus or serving as a garden wall for a suburban home, a retaining wall offers both beauty and structural support to landscapes.
Common Types of Retaining Walls
Traditionally, the most common types of retaining walls fall into four categories:
- Gravity Retaining Walls: These walls are dependent on their own weight to resist lateral soil pressure instead of using anchors or leverage to achieve the same goal. Often the thickest of retaining walls, they consist of stone, bricks or concrete. Shorter walls sometimes use mortarless stone or segmented concrete. Because gravity walls tilt back into the soil, they provide more support and stability.
- Cantilevered Retaining Walls: Consisting of steel reinforced solid concrete slabs, cantilevered walls use leverage to counter lateral soil pressure. They have a heel that sticks into the soil and a toe that sticks out in the opposite direction. This unique base converts the soils horizontal pressure on the wall to vertical pressure in the ground which reduces the pressure of the soil on the wall.
- Sheet Piling Retaining Walls: Excellent for smaller spaces, sheet piling walls are placed directly in the soil and are made of thin layers of wood, vinyl or steel. They are effective at up to 25 feet in height and can be constructed on-site or cast in advance, and the taller the wall, the more need for anchoring. Sheet piling is most effective in softer soils because for every two-thirds above ground, it must go one -third into the ground.
- Anchored Retaining Walls: This type of wall is anchored in place with cables. It is effective in situations where walls experience higher amounts of soil pressure or where walls are thin.
Depending on the purpose of your wall, other options exist such as geosynthetic-reinforced walls, primarily used in large scale construction, and retaining wall systems with self-compacting structural backfill which require less excavation.
Choosing Retaining Wall Blocks
Materials used for retaining wall construction vary from concrete, brick and wood to long-lasting prefabricated concrete options.
- Concrete block: Retaining walls made of concrete block are durable, non-toxic, easy to install, easy to care for and come in a variety of colors and decorative motifs.
- Brick: Brick retaining walls are durable with a classic appearance. They're low maintenance, eco-friendly, and weather and fire resistant. Because they are heavy, they also require exact attention to detail for installation, as well as having a higher price tag and requiring special drainage accommodations.
- Wood: While wood is lightweight and easy to install, it is also susceptible to pests, moisture and rot. It's best for short walls meant to resist light loads.
- Natural Stone: Strong and durable, natural stone offers many design options, colors and textures. It also has a higher cost, and over time, drainage can be problematic.
- Limestone: fireproof, weatherproof, bug resistant and impact resistant, Limestone is easy to clean and has lots of variety. It's also susceptible to staining, doesn’t hold up well to chemicals and is easily damaged by rainwater high in carbon dioxide.
- Stone Veneer: natural stone, custom appearance, various color options, requires contractor or landscape architect. Solid core can be designed in various heights and thicknesses. A façade placed over a retaining wall of other construction (concrete for example).
- Prefabricated Systems: Companies like Anchor offer concrete block retaining wall systems in a variety of shapes, textures and styles that come in individual stones and freestanding walls ready for installation.
Prefabricated systems are worth considering because they come with design plans and most materials. All you need to do is prep and build the wall or hire a professional to construct it for you.
Building a Retaining Wall
Ask any expert and they are likely to tell you the secret to a strong, long-lived retaining wall is the right materials, a solid base and proper drainage. It's possible to construct shorter walls yourself, but walls taller than four feet often require a plan from a licensed engineer and a building permit. Always check with your permits department before beginning a retaining wall project.
How the actual wall is built may vary depending on location, drainage requirements and overall purpose. However, the basic steps are as follows:
- Create a trench according to the design plans. Compact the bottom of the trench and ensure the ground is level.
- Lay a base on which to set your stones. Bases usually consist of sand, gravel or crushed rock. Make sure this base is level as well.
- Set the first block and check that it's level from side to side and front to back. Continue laying blocks and leveling each one from side to sided and back to back, as well as making sure every block is level with adjoining blocks. Sweep each completed row before adding the next row to ensure an even, level wall.
- Lay the second row of blocks in brickwork fashion, staggering them one half block over. Use half blocks on ends as necessary to complete each row. Again, make sure each row is level.
- After a few rows, backfill the wall so it matches the wall height. Then, lay perforated drain tile on top of the backfill and install drain gates as needed. Continue stacking blocks and back filling until desired height is reached.
Refer often to installation instructions, design plans and construction permits as your wall is constructed. A retaining wall built correctly can offer years of protection and beauty.
Work With a Professional
While you may have the DIY skills to construct a retaining wall, it's still a good idea to consult a design professional to make sure you do the job right. The experts at Building Products can help with everything from design to materials to installation. Call the BP professionals today at 800-233-1996, and let them help you design your retaining wall.
Plan and Build a Sturdy Block Retaining Wall
Building a retaining wall in your backyard takes some skill and planning. Installing the retaining wall blocks and creating a natural stone landscape are the easy parts. Constructing freestanding walls on a slope that are both gorgeous and long-lasting are the challenges of this project. Here is a step-by-step guide to building a retaining wall that is sturdy and high-quality.
Get the Proper Permits
Before getting your hands dirty for this large scale project, you'll need to do some research about building permits in your area. Some local areas or neighborhoods may require you to obtain a permit before building. You may also have to adhere to specific rules about how high the retaining block wall has to be and where it must be located.
Purchase Supplies and Materials
After securing a permit, it's time to plan out the project for a concrete wall block. Consider different factors about your yard's size, slope and drainage before drawing up a plan for the wall. Then you will need to go on a supply run and purchase materials for the build. You'll need a tape measure, level, masonry chisel, sledgehammer, rubber mallet, flat shovel, sweeping brush, retaining wall blocks, gravel or sand, gloves and eye protection.
Level the Area
Before building your quarried stone wall, wait until the weather has been dry for a few days so it's easy to install. The retaining wall needs a level base area to start. If you need to dig a trench to create a level space, go down deep enough for at least one full layer of blocks. Smooth the surface out with a vibrating plate compactor or hand tamper. If you're starting on level ground already, use a shovel to remove layers of dirt and level the ground with the flat side of the shovel.
Lay Out a Base
After your soil is level, then you'll need to lay out a base layer to keep your garden wall more stable and secure. You can use either crushed stone, sand or gravel as your base. Aim to create a layer of no more than two inches of base. Spread the material out and level it with a shovel.
Place the First Retaining Wall Blocks
Now it's time to place your first blocks. Start on one end of your natural stone wall and place the first course or level of your wall. Press the block firmly into the base layer so it's secure. Use a rubber mallet to ensure it's firmly placed into the base.
Sweep and Check With a Level
After completing the first course, make sure the entire line is level. Check the alignment with your level tool and make adjustments if needed. Before building the second layer or course of your wall, do a thorough sweep over the top of the blocks to clear away any loose pebbles or debris.
Install the Next Course
Next, begin building the second layer of your retaining wall with additional blocks. You should place the next course in a running bond pattern, a block system that layers the stones in an offset pattern and makes it more stable. This design also looks much more appealing than a system that places blocks directly on top of each other.
Make Cuts To Customize Block Sizes
Building a wall in the offset pattern will require you to use half blocks on the ends of your plan. There are different ways to cut a retaining wall block and get the exact measurements you want so it fits nicely in place. One easy method of cutting involves using a masonry chisel and a hammer. Simply line up the chisel with the groove in the back and use the hammer to break it apart. Another technique for cutting is to use a cutoff saw. The saw makes a cleaner, more precise cut.
Consider Drainage
It's also important to consider drainage as you build your wall. In your wall's design, there should be places for water to drain. Allowing for drainage areas helps keep the wall lasting a long time and prevents excess water from damaging the wall or other areas of your yard. Some drainage options for a retaining wall include installing a pipe drain within the wall's structure, using gravel backfill or creating weep hole openings in the front of the wall.
Avoid Large Gaps
Something to keep in mind as you build, keep your blocks as tight as possible against each other. A precise, tight construction style for your retaining wall can help you avoid water damage from open gaps. A tighter fit also gives the wall a more attractive and finished appearance.
Monitor the Back Area of Your Wall
While building the wall, make sure you're paying attention to the back of the space. There should be some space left behind as you're building the wall. If you run out of room, stop building and dig out behind it more to give your project more room.
Place the Capstones
The final step to building all of the courses of the retaining wall blocks is placing the capstones. These are the stones that make up the top layer of the wall. It's best to secure these stones with a building adhesive so they stay securely in place. Dry off the stones completely before applying the adhesive. Consider putting the capstones in an overhang pattern to give the wall a pleasing design element at the very top.
Use Backfill Material
Once your wall has reached its desired height, it's time to address the space behind it. You'll need to secure the space there with a backfill material. Carefully and slowly fill the back area with a porous material, such as sand or gravel. This will help the stacked stone wall stay stable during heavy rain and other weather events. Regularly inspect your wall, especially after wet weather, to make sure it continues to be sound and secure.
Ready to get started on this doable and rewarding project? Check out the retaining wall design ideas and materials available from Building Products Corp and design something for your yard.
Perks of Building a Retaining Wall
Taking on a new landscaping project can be daunting, even if you are hiring a landscaping crew to help. When considering ways to transform any outdoor living space, one reliable way to do it is by installing a retaining wall.
Unlike other walls or fences, retaining wall blocks are specifically engineered to shift the ground of your yard, directly impacting the way you can use the land you have. Most freestanding walls are meant to provide privacy and aesthetic flair. Fences offer privacy and clearly show where your property ends. Retaining walls, on the other hand, can give you more flat ground on top of these benefits. If you are considering a new landscaping project, here are a few reasons why you should consider installing a new retaining wall.
Stabilize Sloped Ground
When taking on any landscaping project, the sloped ground can be difficult or even impossible to work with. Gazebos, sheds, even gardens and pools need to be on a flat surface. If your backyard is too sloped to work with, installing a retaining wall can give you the flat surface area you need to transform your backyard. Stacking retaining wall blocks allows you to fill in the area in front of the wall with dirt, sand or gravel. Depending on the size of your slope, you may want to flatten the area behind the retaining wall instead. Either way, this gives you plenty of flat ground to create a new garden, install a toolshed or even get an above-ground pool for the whole family to enjoy.
Add Natural-Looking Stone
A retaining wall gives you the chance to make use of new flattened ground, but it can also transform the look of your backyard on its own. Retaining blocks made to mimic natural stone can add a refreshing bit of nature to any landscaping environment. Whether you are installing a retaining wall for aesthetic purposes or want to use it to improve the usability of the land, selecting an arctic grey or oak stone block makes a big difference in how the final product looks. A brownstone garden wall can make a new garden feel more natural, and a concrete wall block near a walkway can have the look of real quarried stone.
Solidify Your Ground
An important consideration when looking for new retaining wall blocks is the purpose of retaining walls in the first place. Retaining walls are used to change the shape of the land, mitigating slopes and giving you flat ground to work with. Unlike freestanding walls, the stacked stone of retaining walls must be able to withstand the thousands of pounds of pressure that the packed earth behind it will exert on it. A retaining block system is specifically designed to hold up to this pressure.
This is done by filling the area behind a retaining wall with gravel or sand, porous materials that can more-easily drain water. Large scale projects may even use drain tile to help alleviate the pressure further.
Another consideration that goes into the design of retaining wall blocks is the design of the retaining blocks themselves. The blocks themselves are shaped in a way that creates a uniform setback as they are stacked. This causes the wall to angle back into the slope, which improves its holding power.
Increase Your Home Value
An important consideration of any home renovation is whether or not it will add to your home's value. Going through the trouble of hiring workers and paying tor ent equipment often doesn't seem worth it if the final product doesn't add any new value to your home, or worse, detracts from it.
In this sense, retaining walls are a sound investment for any home. Retaining wall blocks are easy to install and help transform the very landscape of your home. Retaining block walls are able to turn unsightly and unusable backyard space by creating more flat ground to build new structures on. Almost everyone wants a flat yard for grilling or gardening, and installing a retaining wall in your yard can ensure that future owners will get to enjoy these benefits too.
There are many ways retaining walls can add transform your home. Taking advantage of this innovative engineering allows you to safely enjoy more of your yard.
How To Use Retaining Wall Blocks To Update Your Property
Update your yard with hardscape features to prevent erosion, add privacy and separate spaces. Retaining wall blocks are surprisingly easy to install on your own and add value to your backyard. Refresh your outdoor area with a long-lasting landscaping investment.
Prevent Erosion
The most common use for a retaining wall is for erosion protection. If you have a hillside that is beginning to slump, a durable retaining block wall can keep things together. As long as you follow installation instructions carefully and use an industry-leading block system, you can enjoy a secure structure that can prevent erosion.
Add Privacy
Another popular way to use these blocks is to create a privacy wall. Unlike a wood fence, concrete or natural stone blocks allow you to build freestanding walls that hold up to all types of weather conditions. A solid, firm wall doesn’t allow nosey neighbors or passersby to peek into your property, so it’s a much more private solution than a traditional fence.
Separate Spaces
A natural stone garden wall is a beautiful way to mark a pathway and separate your living area and your garden. Line a patio with a rock wall to visually separate spaces or build a small wall to discourage your pets from entering your garden. A natural stone wall is a sturdy option for a dividing wall and you can purchase a block system that matches the look and feel of your patio or pavers.
How To Install a Block Wall
There are a few steps to installing a wall, but by following this guide and using quality materials you can create a safe, long-lasting structure. You can always hire a landscaping team to construct a wall for you if you’re unsure about one or more steps in the process. Here are the basic installation steps:
- Dig a level trench
- Compact the bottom of the trench
- Add a crushed stone foundation
- Lay a clean, level course of blocks
- Add drainage lines
- Install two courses below grade before completing your wall
Digging a trench can require professional excavation tools or can be achieved with a shovel, depending on the depth and width of your retaining wall. The most important feature of your trench is that it’s level and deep enough to bury the crushed stone foundation and two courses of retaining walls.
Tamping down the trench is an important step that prevents your wall from settling after completion. Again, you have professional vibrating plate compactor options or a simple hand tamper can complete the task for a small retaining wall.
Crushed stone as a foundation keeps your wall firm while the ground freezes and thaws around it. Place between 6 and 8 inches of fill in your trench and save enough to the side for backfill.
Now it’s time to start laying your retaining wall blocks. This step can seem tedious, but it’s essential to get the first course just right. Carefully measure your course of blocks and ensure that they are level and aligned just the right way. A crooked line or unlevel course will become much more obvious as you build your wall. It can even create a dangerously imbalanced retaining wall, so take your time with this step. Keep each level clean and free of dust and rocks to avoid debris creating an uneven surface.
Retaining walls need proper drainage to prevent water pooling on your property. Lay a drainage line behind a few courses of blocks and add drain gates every 25 to 50 feet. Otherwise, you may have muddy spots on your lawn and the weight of water can damage your retaining wall.
The rest of the project is about lining up course after course of blocks until you’re satisfied with the height and alignment of your retaining wall. Backfill the wall with the remaining loose stone before adding the capstones on your retaining wall and the top layer of soil.
Start Your Project With a Building Products Block System
One of the best ways to construct a retaining wall, garden wall or privacy wall is a Building Products block system. Shop today to explore the various designs and colors available for your outdoor structure. Use these steps to build a wall and enjoy industry-leading materials for a structure that’s built to last.
Concrete Blocks for Strong Retaining Walls
A retaining wall can protect your residential landscape by preventing soil loss due to water runoff. Although various materials are suitable for such barriers, many homeowners choose retaining wall blocks because they are practical and aesthetically pleasing.
Benefits of Retaining Wall Blocks
The material you choose for your wall will determine its longevity and ability to function correctly. Concrete blocks have various characteristics that satisfy these requirements and others.
- Durable: Concrete is one of the most robust building materials. It can withstand a wide range of environmental conditions, including rain, snow, ice, and extreme temperatures, without warping or cracking. It is a dense material that will not succumb to the pressure of soil's downhill movement.
- Affordable: Concrete blocks are produced in bulk quantities, making them available and affordable for large-scale projects or homeowners working within a budget.
- Customizable: Concrete is available in a wide range of design options that allow homeowners to create unique landscape embellishments.
- Resistance: Concrete block retaining walls are naturally resistant to fire, rot, and contraction from temperature changes, making them an excellent choice for protecting a home from various natural disasters.
How to Select Retaining Wall Blocks
The selection of retaining wall blocks can contribute to the appeal and value of a residential property. Homeowners can choose from three main options to achieve the look they desire.
Basic Concrete Blocks
Standard concrete blocks have a length of 16 inches, width and depth of eight inches, and weight of 35 pounds, although it is possible to find them in other sizes. They typically have two hollow cavities, useful for adding insulation, placing water drainage pipes, or providing easy installation because they require less mortar than material options. It is common to add a decorative veneer to standard concrete blocks, which otherwise do not have much aesthetic appeal. This step can give a wall a more natural look, but it is labor-intensive.
Split Face Blocks
Homeowners who want a durable wall that adds visual appeal to their landscape but want to forgo the time and added expense of applying veneers to standard concrete blocks can choose versatile split face blocks. Texture and color resembling that of natural stone are achievable by pouring concrete with colored pigments into pre-shaped molds. The resulting blocks are suitable for all kinds of design schemes and are usually indiscernible from the stones they resemble.
Retaining Wall Systems
Block wall systems make the installation of retaining walls less laborious and provide significantly more design choices than other options. These modular systems have individual components that come together in patterns, configurations, and sizes pre-determined by the manufacturer but offer enough flexibility to achieve a customized appearance.
A significant advantage of retaining wall systems is their ability to stabilize and hold together without mortar. Instead, individual blocks commonly have a protruding lip that fits beneath other blocks whose weight provides the necessary adhesion. As a result, the complete installation of block wall systems does not take as long as different wall types. Many designs also account for the placement of blocks around curves and corners that would otherwise require extra time and skill to execute correctly.
How To Maintain the Condition of a Retaining Wall
A retaining wall is an excellent way to make a sloped landscape more usable, prevent soil erosion that can compromise a home's foundation, and redirect water that might oversaturate plantings. It is necessary to take various measures to avoid a wall's premature deterioration.
Check the Land Surrounding the Wall
After the retaining wall's installation, it is necessary to fill in the surrounding space with soil to prevent erosive water pooling that could compromise the wall's foundation. Repeating this process every year will help retain the wall's stability.
Fill Empty Ground with Vegetation
The integrity of a retaining wall is contingent upon densely packed soil. Adding greenery to empty spaces around a wall prevents the loosening and shifting of soil by creating a network of stabilizing roots.
Inspect Drainage Pipes
Drainage pipes allow water to flow out from the ground behind a retaining wall. Without this necessary feature, water can pack the soil until it exerts tremendous pressure against the wall, leading to its collapse. Routinely removing debris from pipes ensures the release of liquid left by rain or snow.
Consult with a dealer specializing in retaining wall blocks to provide you with options that will add function and beauty to your landscape and increase your home's value.
5 Steps To Complete When Building a Retaining Wall With Blocks
You may have always wanted to build a retaining wall to add curb appeal to your home, provide structure for your landscaping, and keep your flowers and vines from spreading into the grass. Retaining walls, or garden walls, can increase curb appeal and provide hours of interesting and fun DIY work with which the whole family can help. Roll up your sleeves and get ready to learn: You will need to complete several steps before — and a few steps after — actually installing the retaining wall blocks themselves!
- Pick a Location and Acquire Permits
You may be surprised to learn that you sometimes need a permit to build a structure on your own land. If you were to build a home, a small addition to your existing home, or even a large covered patio in your backyard, you would certainly need a permit to ensure quality and safety. Retaining walls are no different: The rules may be a little different depending on where you live, but you will likely need to acquire a permit — and potentially draft a design plan with the aid of a structural engineer before starting construction — if you are planning to construct a wall that is over four feet tall.
- Ready Your Foundation
Digging a trench that holds the base of the wall will increase support throughout the entire structure. You should create a trench where your wall is going to reside that is deep enough to hold the base material — like those crushed stones mentioned above — and wide enough to fit your retaining wall blocks. Aim for about eight inches of space behind the wall.
- Purchase Your Materials
If you’re building a small wall and you’re not working with a structural engineer, you can draft a plan for the wall yourself. Will you work with real stone, concrete blocks, or stone-like blocks that may be easier to transport and stack? You should consider the overall look of the wall, the color, the square footage of the space (and how many blocks you will need to purchase), and your designated budget before making purchases. When you buy your blocks, take home the support material, like sand, gravel, or crushed stone as well. Additionally, you will need to have the following equipment on hand during construction.
- Flat shovel
- Level
- Chisel
- Sledgehammer
- Safety equipment: work gloves, goggles, and possibly earplugs
- Install Your Blocks
If you’re sure you’ve measured everything correctly, the first thing you’ll want to do when beginning the actual construction is level the ground. This may involve digging, scraping soil, or cutting out large chunks of dirt with your shovel before you place your level on the ground to check it. After you finish this step, you will complete the following steps when installing your wall.
- Lay the base material (sand or gravel)
- Set your first row of blocks and check them with the level
- If you’re alternating blocks (which is best for stability), make sure to cut some half-blocks with your chisel to complete every other row so that the ends are even.
- Finish Your Structure
You’ve probably noticed that your level plays a big part in this process, and you’re correct. You should remember to check your blocks frequently with your level to ensure that the entire structure is even and that it does not lean too much to one side, which could cause it to be unstable. And, speaking of stability, remember the eight-inch gap you left in your trench? Now is the time to pour in the backfill: You can fill up that space behind the wall with a porous material (more sand or gravel) to firmly secure the structure. After you’ve finished this step, you may pour in your topsoil, or whatever material you will be using for landscaping, into the space created by your new retaining wall.
Constructing a retaining wall is a job that requires skill, strength, and foresight. Plan ahead by acquiring the necessary permits, build off a solid foundation, and use quality retaining wall blocks to ensure that your structure will last as long as the rest of your house. Get in touch with Building Products Corp today to find retaining wall products that will match the look of your home and stand the test of time.
Do You Need a Retaining Wall for Your Property?
As a new homeowner, you have a lot to learn about taking proper care of your property. You also likely want to get ahead of common issues before they rear their heads. Do you know if you may need retaining wall blocks? Building Products Corp is here to answer that question and set you up with a wall if you do. See if any of the following sound familiar.
You Notice Problems With Water Drainage
Do not brush off standing water in your garden or yard, as it could indicate that water doesn't drain the way it should. Left unchecked, water drainage may lead to insect infestations and drowned roots. By erecting freestanding walls, you have a way to direct water to waterways like storm drains.
You Want to Grow Greenery on Flat Land
Maybe you live on an incline or multi-level landscape, making it difficult to plant a garden. A retaining wall opens the possibility of turning your yard into a lush landscape full of greenery and color. No longer do you have to worry about gravity ruining your efforts to test your green thumb.
You Live in an Area With High Winds
High winds may help keep you cool in the summer, but they can also make your property susceptible to soil erosion. When you have dry soil, heavy winds may whisk it away from your property, making it hard to plant anything. Erecting a concrete wall block safeguards your soil and anything you plant in it.
You're Worried About Your Home's Foundation
Over time, erosion may jeopardize your property's foundation. A sizable foundation gap leaves your property vulnerable to water infiltration and a cracked foundation. A proper block system may save you from an expensive and preventable repair by diverting water away from your foundation.
Don't wait a day longer than necessary to install a retaining block or wall on your property. To explore your options, submit a Contact Us form to get in touch with a Building Products Corp representative.
How To Use Blocks To Create a Retaining Wall
Retaining walls are important for beautifying property and separating flat areas from sloping areas. Are you looking for a low-cost way to build a retaining wall yourself? You’re in luck because you can create a professional-looking wall very affordably with a few retaining wall blocks. Here’s how.
Level Out the Ground Where the Blocks Will Be Placed
Once you determine where you want your freestanding walls to be, make sure you level out the ground so it’s flat. You can do this by using a shovel to remove excess soil or bring in soil. If the area where you’re working is very sloped, you may need to bring in some heavy equipment to excavate and create a flat space.
Create the Base
Once you’ve created a suitable flat area, it’s time to lay a porous base. This will facilitate proper drainage and make it easier to create a level layer of blocks. To create the base, spread gravel or sand about 2 inches thick where the first block row will be placed. Smooth the base layer with a level.
Set Your First Row
Next, you’re ready to set your first row of blocks. Begin at one end of the wall and press each brick down firmly. Continue laying down adjoining blocks until your first row is laid. Use a level throughout the process to make sure every retaining block is straight and level.
Set the Next Rows
Use an offset pattern to lay the next row of blocks on top of the first. Install the full row of natural stone on top of the first before cutting and installing your end blocks to make the ends of the rows flush.
Continue this process for the next rows.
Backfill
Once your retaining wall is built, backfill behind it to set it in place. Use porous material for the backfill so water can drain away.
This is an affordable and easy way to use retaining wall blocks to create a durable and attractive retaining wall. You can also contact Building Products Corp to get the job done for you in minimal time.
Building a Retaining Wall With Concrete Blocks
Retaining walls are a great addition to the home landscape. Specially designed wall block like the ones we manufacture at Building Products Corp can help you bring this feature to your own yard. Keep reading to learn more about our retaining wall blocks and how to use them to create a durable and attractive retaining wall.
Features of Our Concrete Retaining Wall Blocks
Interlocking block systems like ours make building a retaining or freestanding wall a reality for many homeowners. Some features people enjoy include:
- Durability
- Easy to install design
- Attractive Appearance
Tips For Building a Strong Retaining Wall
Our retaining wall blocks make building a beautiful and strong retaining wall simple. Their easy to install design makes them perfect for DIY applications, too. Use these tips to create a backyard feature that will last for years to come.
Layout your design: Start by laying your design out on the ground with a single layer of block and mark the pattern.
Level the ground: If you want to have the strongest wall, you need to build it on a solid foundation, so don't skip this important prep work. A flat shovel will be helpful in this step. Use it to level the ground. Check your work with a line level.
Install the base material: Use a 2-inch layer of gravel or sand to create a base for your wall. This increases its stability.
Set the First layer: Start at one end of the block and set the first stone in place. Work your way across the first layer, using a level to check your height every few retaining block.
Build it up: Continue adding layers to your wall while checking for level. The seams should alternate in a running bond pattern. You will need to cut half-blocks for the ends.
Building Products Corp has been making retaining wall blocks since 1945. We are experts in the design and construction of high-quality concrete blocks for residential and commercial applications. Contact Building Products Corp today at 800-233-1996 to learn more or fill out our simple online form to request a free catalog.
Tips on Building a Retaining Wall
Retaining walls are valuable in landscaping for both form and function. They fight soil erosion while helping control the elevation and contour of your backyard. Many homeowners make use of retaining walls as a DIY project to enhance outdoor spaces. If this appeals to you, keep these tips in mind.
Choosing Materials
What you use to construct a retaining wall should be informed by the scope of the proect as well as the ease of obtaining and using the materials. Poured concrete reinforced with timber or iron bars sees use in larger walls, but for your backyard you should be able to build a wall using retaining wall blocks. Most home improvement retailers carry these.
Consult Building Codes
Retaining walls have a distinct effect on their surroundings, particularly with water drainage. Additionally, taller walls require more significant engineering work. Check local building codes to see what the standards are, including whether or not you'll need a permit or an inspection from an engineer. You may need to submit the plan to community leaders in the process.
Foundation is Key
A retaining wall can only be as strong as its foundation will allow. The beginning stages of the project make all the difference in how the wall turns out. Build on a level surface, especially with blocks, and dig a trench to keep the lowest bricks in place; this ensures that the next layers are also stable and level.
Don't Go Overboard
The taller a retaining wall is, the more difficult it is to keep it stable. This is why only professionals can build a wall four feet tall or higher. If you have a tall slope that you need to retain, consider multiple tiered walls instead of a single tall wall. This also creates a nice stepped appearance.
When you want to revamp the land around your home, good building materials are key. Building Products Corp provides a range of high-quality stone bricks and blocks that mimic the rough-hewn look of natural stone. Take a look at our catalog, as well as design inspirations, and place an order today!
Considerations for Building a Retaining Wall
As part of a home remodeling project, you want to erect a retaining wall on your property. You have a design idea in mind, and you know the color combination you want. To help you make the most of your ideas and the retaining wall blocks you choose, Building Products Corp offers considerations to remember during your project.
Permissions and Codes
Did you check with city officials to find out whether you need a permit to build freestanding walls? You need proper permissions to erect the structure because the project involves maximum height, property lines and related conditions. If you need a permit, ask about restrictions related to neighboring properties and reasonable building practices. You may also want to let your neighbor know about your retaining wall if it brushes against your shared property line.
Structural Concerns
How your retaining wall looks depends on your needs. Do you want a layer of privacy? Would you like to keep your pets and children safe? Perhaps you want a definite way to mark off your property. Either way, your wall must accomplish the major task of holding back the earth. Further, the design must accommodate for the weight of earth soaked with water.
To offer maximum protection from the earth, your wall must have a space behind it for sand, gravel or similar material that allows for proper drainage. Depending on how high your wall stretches, it may make sense to include a drain tile.
Which material do you feel suits your wall most favorably? Common options include natural boulders, wood timbers, concrete and bricks. Concentrate on the wall's accumulated weight to make a choice you feel most comfortable with.
Should you go with stacked stone for your wall or quarried stone? For answers to these questions and more, reach out to us here at Building Products Corp by submitting a Contact Us form or calling 800-427-6282.
Building a DIY Retaining Wall
Homeowners can find countless uses for a well-constructed retaining wall. Often, a retaining wall is used as a landscaping feature, designed to provide room for gardens or other planting projects. But a retaining wall is not necessarily cosmetic and may serve important physical functions, like preserving hillsides and preventing erosion.
There are many ways to build a wall, but one of the most user-friendly and easy to install methods is to utilize retaining wall blocks, particularly ones made of concrete. These walls are quite feasible to construct with little experience.
How Does a Retaining Wall Function?
A stacked stone retaining wall essentially works by holding the earth in place, and thus must be sufficiently strong to withstand heavy pressures of the earth behind it (and related events, like severe downpours or heavy snowfall). To cope with water, retaining walls are often partially backfilled with gravel, sand, or utilize drain tile. While many materials can be used to create a retaining wall, the use of either quarried stone, or a concrete wall block system, tends to be most comfortable for beginners, and most structurally reliable.
How Is a Retaining Wall Built?
If using a block system, the basic steps are as follows:
- Level the ground.
- Lay and level sand or gravel for the base (in a roughly two-inch layer).
- Set your first level of blocks, ensuring they are well aligned and level.
- Set subsequent layers, using a "running bond" system, and chiseling off overhanging block ends as needed. Ensure the wall stays level throughout. Provide slight setbacks on rising layers, slightly leaning your wall into the hill.
- Finally, backfill the wall using as much porous material (sand or gravel) as possible. If necessary, you may wish to install added drainage below the wall, or landscape fabric along the back of the wall.
Start Building Your Wall
Ready to build? Contact us today to assist in finding a contractor in your area, review design ideas for a garden wall or retaining wall, or source necessary materials.
Step-by-Step Instructions for Building Your Own Retaining Wall With Retaining Wall Blocks
If you want to put up a retaining wall using retaining wall blocks, here are step-by-step instructions for completing the project correctly.
Step 1: Prepare the Ground
Before you start laying blocks for your freestanding walls, you need to prepare the ground. Do this by leveling the soil where your retaining wall will be located.
Step 2: Lay a Porous Base
You’ll want to have a porous base to help your concrete block wall be as stable as possible. This will allow water to drain through. Sand or gravel are both great options. Try to spread a 2-inch layer of either of these materials in the area where you plan to install your garden wall.
Step 3: Place the First Layer of Retaining Wall Blocks
Starting at one end of your stacked stone wall location, place the first layer of retaining wall blocks firmly in the ground without squeezing away the base layer. Each quarried stone should be placed level with the one net to it (use a level to help you get straight lines).
Step 4: Place the Remaining Layers
Once your first layer of natural stone is placed, begin with the next row. Make sure the next row of stones is “offset” by about ½ block instead of aligned directly on top of the lower row. This will create stronger freestanding walls and will also look more aesthetically pleasing. When you get to the end of the row, cut off half the blocks so the edges of the walls at either end line up with the blocks below.
Step 5: Backfill
When all the stones are in place, use sand or gravel to backfill the area so water drains away without putting too much stress on the wall.
Learn More
This type of garden wall is so easy to install and can help you separate different parts of your property in an attractive way. To learn more about retaining wall blocks and other home improvement materials, contact Building Products Corp.
Your Guide to Building With Retaining Wall Blocks
If your home is backed up against a hill or mountain, retaining wall blocks can help you avoid soil erosion. Stacked stone can also be used to build freestanding walls that separate your property from someone else’s. Here’s how to use retaining blocks to create a retaining or garden wall.
Gather Your Tools
Before you begin working on your retaining wall, you’ll need to gather a few tools, including:
- Flat shovel
- Work gloves
- Eye protection
- Tape measure
- Level (2 feet or 4 feet)
- Masonry chisel
- Hearing protectors
- Coarse gravel or sand
- Retaining wall blocks
- Small sledgehammer
Once you have these tools, you’re ready to build freestanding walls that are easy to install and can be finished in a single day.
Build a Wall Using Your Retaining Wall Blocks
Here are step-by-step instructions for building a wall using your concrete wall blocks.
Step 1: Level the ground using your shovel.
Step 2: Spread out your gravel or sand where your first layer of stacked stone will be placed. Try to make this layer about 2 inches deep.
Step 3: Set your first retaining block on the base layer, pressing down firmly but not hard enough to displace the base layer.
Step 4: Continue laying the rest of the base layer of blocks, using a level to make sure each block is level in both directions.
Step 5: Set the next layer of blocks on top of the first, but offset them so one end of the upper block is aligned with the middle of the lower block. Continue laying the blocks this way and cut off any overlapping pieces of the blocks at the end of your row.
Step 6: Continue this pattern until you have laid every row of blocks.
Step 7: Slowly and carefully backfill behind the blocks to secure them in place.
Contact Us
Today is a great day to build a retaining wall! To order natural stone retaining wall blocks, contact BP Building Products today.

Your Quick Guide to Building a Wall With Retaining Wall Blocks
Using retaining wall blocks to build freestanding walls is easier than you think. Here’s how to get started.
Gather All Your Tools
Before you can build your retaining wall, you need to have all the right tools. Gather the following:
- Flat shovel
- Ear and eye protectors
- Level (2- or 4-foot)
- Tape measure
- Gravel or coarse sand
- Small framing hammer or sledgehammer
- Work gloves
- Masonry chisel
- Retaining wall blocks
Now that you have your tools gathered together, it’s time to start on your easy-to-install garden wall.
Make the Ground Level
You’ll need to make sure the ground is level before you lay your concrete wall blocks. To do this, use your shovel to remove soil in the area where your wall will be located. Use your level as needed to make sure you get the ground nice and flat.
Lay and Smooth the Base
Your base needs to be porous, which is where your gravel or sand comes in. Spread a layer of gravel or sand that’s about two inches thick where your first row of blocks will be laid.
Put Your First Row in Place
Pressing firmly but not so hard that you displace your base layer, lay your first row of blocks in place. Periodically use your level to make sure the wall is straight. Once your first row of natural stone blocks is laid, you can start with the next row. Offset the second row by half a block to get a nice brickwork pattern.
Finish the Ends
At the ends of your wall, you’ll need to cut half blocks every other row to ensure a smooth end seam. Use your chisel to cleave the rock into two pieces, using the V-notch grooves on the backside to ensure a clean split.
Backfill
To keep your wall in place, you’ll need to backfill. Do this by filling the space immediately behind the wall with gravel or sand.
A retaining wall can be a beautiful and functional addition to any part of your yard. Ready to get started on your retaining wall project? Contact BP Building Projects for your stacked stone purchasing needs.

Changing Your Landscape With Retaining Wall Blocks
Hardscaping is a key design element in creating an outdoor space that is functional and appealing. Hardscape features bring definition to a space and tie together natural softscape features. Retaining walls are a hardscape element that serves decorative and practical purposes to enhance the form and function of your property. Considering how a wall will be used will help you select appropriate retaining wall blocks for your project and keep things from getting a bit “rocky.”
Determine the Purpose
You may hear the terms “retaining wall” and “garden wall” used interchangeably but this is a common mistake. Understanding the differences between the two structures will help you decide which type of wall best suits your needs.
Retaining walls, while used to add dimension and visual appeal, are primarily utilitarian. They are designed to support the weight of soil on both sides of the wall, preventing the soil from shifting and also, leveling the grade of uneven or sloped landscaping. To be safe and effective, retaining walls are constructed from blocks that are heavy and large.
Garden or freestanding walls are purely for aesthetics and have minimal functionality. The stones used for these walls are smaller and lighter than those used for retaining walls.
Choose Materials
Once you’ve determined which wall you need, there are several materials to choose from:
Concrete Wall Blocks
- Ideal for retaining walls
- Tremendous holding power
- Easy-to-install block system
- Less attractive than other options
Quarried Stone
- Perfect for freestanding walls that are two feet or lower
- Gives the appearance of natural stone
Stacked Stone
- Easy to install using the dry-stack method
- Does not require mortar between stones
- Needs to be flat
Natural Stone
- Attractive and durable
- Tends to be more expensive than other options
- Can be installed using the dry-stack method or mortar
Rely on Trusted Experts
It can be overwhelming to choose the right stone. Let us help! From smaller residential products to large-scale commercial products, Building Products offers a full range of retaining wall systems that are easy to install and give the impression of natural stone. Contact us today for expert advice on your next project.

Steps for Building a Wall With Retaining Wall Blocks
Are you thinking about buying retaining wall blocks so you can create one or more freestanding walls on your property? If so, here are some helpful steps to guide you through the process.
Step 1: Get a Permit
If regulations in your area require it, make sure you get a building permit before you begin working on your stacked stone wall. You can contact your local permitting department for instructions on how to get started.
Step 2: Gather Your Equipment
You’ll need the following to build a large scale quarried stone wall:
- Work gloves
- Eye protection
- Masonry chisel
- Framing hammer or small sledgehammer
- Hearing protection
- Tape measure
- Level (2- or 4-foot)
- Coarse sand or gravel
- Flat shovel
- Retaining wall blocks
Step 3: Prep the Area
To prepare the area for your retaining wall, make the ground nice and level using your shovel. Then lay your base layer (a 2-inch layer of gravel or sand). Smooth it out to make it even.
Step 4: Lay Your Blocks
Lay your first block. Press it firmly into the base layer, but don’t press too hard or your base layer will be pushed out of the way. Once you have the right placement for the first block, place the next block (and so on, until your first layer of retaining wall blocks is placed). Use a level to make sure everything is straight.
Step 4: Add the Remaining Layers
When you’re ready to lay the next layer of blocks, offset the first block so it is located halfway across both blocks beneath it. Continue this pattern until all blocks are laid.
Step 5: Cut Off Uneven Ends
Use your chisel and hammer to cut off the uneven ends so you get flush edges on your wall. You can also use a framing hammer to do this part. Fil in the backside of the wall with additional soil as needed.
Purchase Your Retaining Wall Blocks
When you’re ready to purchase retaining wall blocks, check out the selection here at Building Products Corp. Feel free to contact us if you need help making a selection.
3 Tips for Building a Retaining Wall for Your Home
Adding a retaining wall to your property has several benefits, including preventing soil erosion, creating flood control options, adding functionality to your property, and even creating beautiful, aesthetically pleasing landscaping. Choosing the right retaining wall blocks is just part of the planning process, though.
1. Think About the Structural Requirements
f your goal is to keep pets and children safely in the yard, then you won't need as high of a wall. On the other hand, if there is a large slope near your home and you need to protect it from water runoff, you'll need a much taller retaining wall. In this case, you may even need drain pipes or other ways to reduce the pressure on the wall during heavy rains.
2. Find Out if You'll Need Building Permits
Many cities and towns require building permits for retaining walls. They may also have guidelines regarding zoning laws, how tall they can be, and more. Checking with your local permit department is essential, as starting a project without proper documentation could lead to big fines. In some areas, you may be restricted from creating some types of retaining walls or from cutting back into the land, especially if it could negatively affect the neighboring property's drainage patterns.
3. Consider Hiring a Professional
A lot of technical knowledge is required to build a retaining wall, which means that it's a good idea to hire professionals rather than to try it as a do-it-yourself project. Retaining wall installation experts have the experience and knowledge to choose the right retaining wall blocks and install them in a way that is not only beautiful but functional. Professionals also work with high-quality equipment and materials, which means there's less of a chance of the job being done incorrectly. In the end, hiring an expert now can save you time and money down the line.
When hiring a professional to help you install retaining wall blocks, always look for someone who is licensed, insured, and willing to provide you with a portfolio of work. Get in touch with the experts at Building Products Corp for more information.
Your Guide to Building a Retaining Wall With Blocks
Need a little privacy on your property? Here’s how to use retaining wall blocks to create a sturdy retaining wall.
Tools You Will Need
You’ll need some tools to build your freestanding walls with retaining blocks. They include:
- Masonry chisel
- Tape measure
- Retaining wall blocks
- Gravel or coarse sand
- Framing hammer or sledgehammer
- Level
- Gloves and eye protection
- Flat shovel
Once you’ve collected all these tools, you’re ready to build your stacked stone wall!
Steps to Follow
A block system retaining wall is easy to install, making it an excellent option for a weekend project. Here’s how to do it.
- Level your ground using a shovel.
- Put down a base layer (about 2 inches of gravel or coarse sand) and level that out, too. You may need to use a hand tamper.
- Figure out where you want your first quarried stone block and set it down on the base layer. Press firmly but not hard enough to squeeze away that important base layer.
- Lay the next block next to the first and so on down the first row of blocks.
- Use the level to make sure the first row of blocks is nice and straight.
- Set the next layer of blocks on top of the first (offsetting them by one-half block). Cut the end pieces to create a clean line on the ends.
- Lay the next layer of stone the same way you did the second layer, and so on until you achieve the wall height you want.
- Use gravel or sand to backfill behind your wall. Porous material will help water easily drain away, which will minimize the weight put on the back of your wall.
And there you have it: easy instructions for building a retaining wall with retaining wall blocks. If you want to plant bushes or flowers around your wall, simply put dirt and topsoil on top of your backfill material. Find natural stone blocks for your retaining wall at Building Products Corp.
How To Build a Retaining Wall in a Weekend With Blocks
If you are want to create privacy or improve the aesthetic appeal of your property using retaining wall blocks to create a functional and decorative wall is a smart option. It’s also an easy-to-install project that you can do in a single weekend. Here’s how to create freestanding walls with blocks.
Gather Your Tools
You’ll need the following tools to build your wall from quarried stone:
- Small sledgehammer
- Eye and ear protection
- Work gloves
- Tape measure
- Flat shovel
- Level
- Retaining wall blocks
- Coarse gravel or sand
- Masonry chisel
Once you have the tools, you can begin your project.
Steps for Building a Wall With Retaining Wall Blocks
Here are the steps for building your retaining wall with stacked stone.
- Level the ground using a shovel and level.
- Lay the base of coarse gravel or sand (approximately 2 inches deep).
- Figure out where your wall will begin and set your first block. Press down firmly but not so hard that you displace the base layer.
- Lay the next block beside the first and continue on until your first layer is placed.
- Use a level to make sure your first layer is straight and make adjustments as needed.
- Set the next layer of retaining wall blocks on top of the first. Be sure to offset them so the seams on the second layer offset the seams on the lower level by one-half block.
- When you get to the end of your wall, cut off the half blocks that are protruding out further than the rest.
- Backfill behind the wall with a porous material.
This simple natural stone retaining wall project is easy to complete and can make a big difference in how your landscape looks.
Find the Materials for Your Project
If you’re looking for retaining wall blocks, you’ve come to the right place. Check out the selection of DIY retaining wall project materials here at Building Products Corp.
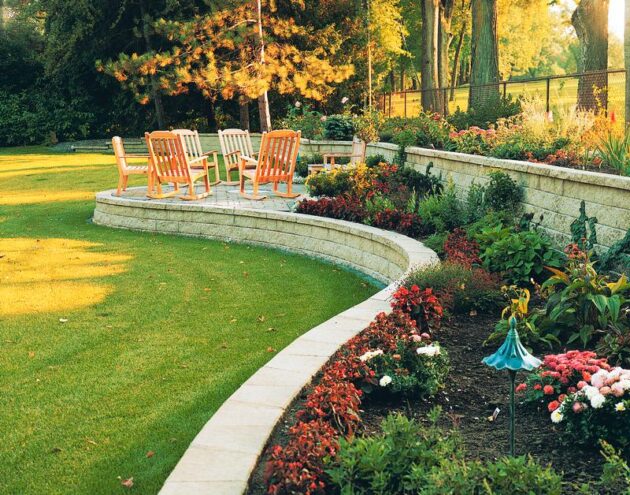
Build Your Own Retaining Wall With Blocks
Retaining wall blocks offer an attractive and durable solution to many landscape situations. For example, they can be used to create terraces, define a seating area and support a garden. One of their best features is that they make it possible for homeowners to create their own beautiful walls. Here we walk you through the steps of building a block retaining wall.
Select Your Site and Design
Before you get too far ahead, you want to define exactly where your wall will be located and how it will look. Line marking paint makes it easy to visualize the wall's eventual shape in your yard; it also enables measuring so you can order an accurate amount of block and base material.
Gather Supplies and Materials
Once your block and base material are onsite, you can gather the remaining materials to start. For most retaining walls, you will need:
- Safety equipment (gloves and eye and ear protection)
- Masonry hammer
- Flat shovel
- Level
- Tape measure
Build Your Retaining Wall
Once everything is gathered together, you are ready to assemble the wall. Here's how:
Spread Out a Base
Start by spreading a base layer of gravel or sand where you plan to place the retaining wall blocks. Then, tamp this down with a flat piece of lumber and check that it is level.
Lay the Frist Course of Retaining Wall Blocks
Once you have laid a base layer, you can set the first course of blocks. Then, gently tap each one into the sand and check it for level.
Add Additional Layers
Stagger the next course of blocks so that the joints do not align. This requires splitting several to create a half-block for the ends. This is done by hitting the groove in the back of each block with your brick hammer. Continue adding successive rows following these principles until the wall is the desired height.
Top Quality Retaining Wall Blocks for Your Next Project
With the right tools and supplies, a homeowner can build an attractive retaining wall with blocks. We carry a complete line of attractive retaining wall blocks at Building Products Corp. Contact us today to learn more or request a free product catalog.

Key Details Before Planning a Retaining Wall Project
If you’re looking to enhance your sloped landscape into usable flat space, you can use retaining wall blocks to help define and create a workable space. You can use a retaining wall to create an area to house a patio or gazebo, and with the use of natural stone or quarried stone, you can have an element that is both functional and eye-catching. Whether you choose to hire a local contractor or you prefer to do it yourself, Building Products Corp carries just what you need.
Consider the Structural Elements
When you begin designing your space, your first priority should be the structural integrity of the space. A simple garden wall is better suited for issues with privacy or marking the boundaries of your property. Though structurally important, it isn’t as critical as the safety demands of a large-scale project that must hold thousands of pounds of force from water-soaked dirt and rock. The block system and dimensions of the wall be adequate for the project. A freestanding wall has different structural and weight requirements than a retaining wall, which is why it’s best to talk with our experts about load-bearing options.
Prepare the Space
The key to a strong retaining wall is properly preparing the space for the build. Though concrete wall blocks or stacked stone are heavy-duty in their own right, unless the area is completely level and outlined with a porous base, your wall could be susceptible to failing. Use sand or gravel to help prepare the space, and with patience and quality materials, your retaining block wall should be easy to install.
Contact the Retaining Wall Block Specialists
Building Products Corp can help you build something beautiful out of the many retaining wall blocks, pavers, bricks or stacked stone options we carry. Check out our selection and find out how to take your landscape project to the next level. Request your free catalog today.
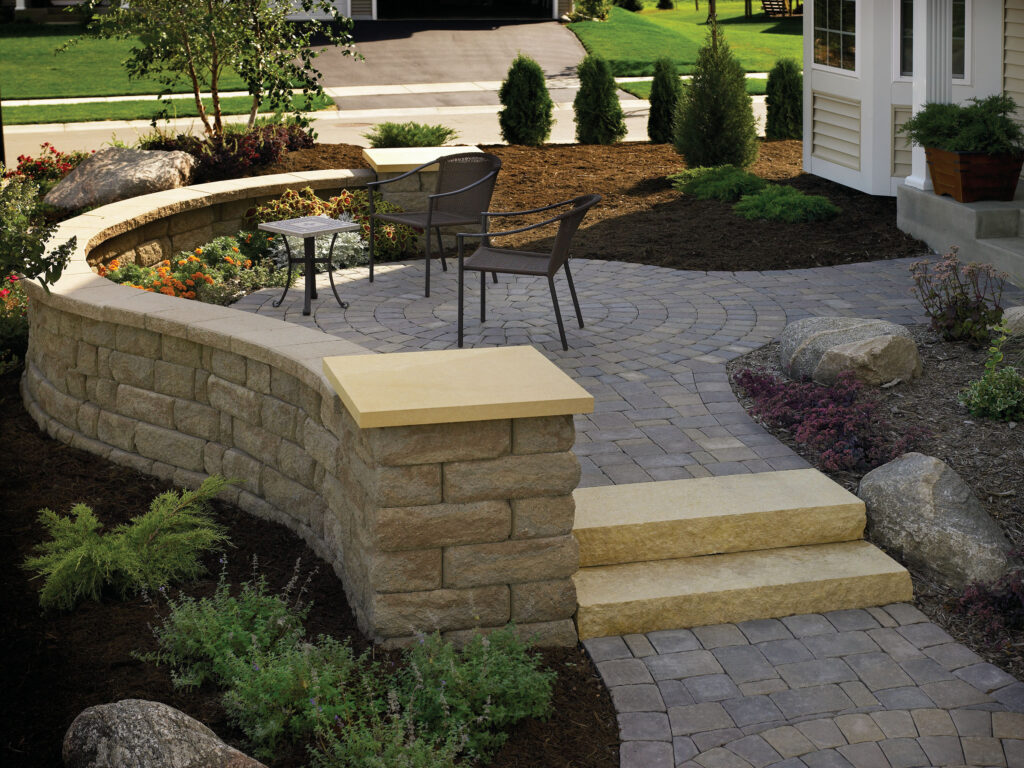
Your Guide to Creating a Garden Wall With Retaining Wall Blocks
Are you thinking about building a DIY garden or privacy wall with retaining wall blocks? Here are some user-friendly instructions to complete your easy to install wall.
Gather Supplies
You’ll need some basic supplies to complete your concrete wall block wall. They include:
- Retaining wall blocks
- Flat shovel
- Eye and hand protection
- Masonry chisel
- Tape measure
- Coarse sand (or gravel)
- 2-foot or 4-foot level
- Framing hammer or small sledgehammer
Once you’ve gathered everything you need, you can get started on your garden wall.
Follow These Steps
Here are the steps you’ll need to follow when creating your freestanding walls:
- Use your shovel to level the ground and create a good base for your natural stone wall.
- Lay a base of approximately 2” of coarse gravel or sand where you plan to place your first layer of blocks.
- Set your first block (at one end of your wall) on top of the base layer. Press down firmly but don’t displace the base layer.
- Make sure your first block is level in both directions.
- Using the same process, lay your first course of blocks next to the first block.
- Once your first layer is placed, check the entire layer with a level and make adjustments as needed.
- Use the same technique to lay the next level of blocks on top of the first layer. Offset each block by one-half of the block below.
- Cut off any end pieces that jut out past the ends of your wall.
- Continue laying all your block layers until you are finished.
- Backfill with sand or gravel behind the wall to allow for proper drainage.
Get the Retaining Wall Blocks You Need for Your Project
When you’re ready to begin your project, you’ll want to buy high-quality retaining wall blocks. You can find blocks, pavers and many other DIY project materials at BP Building Products.
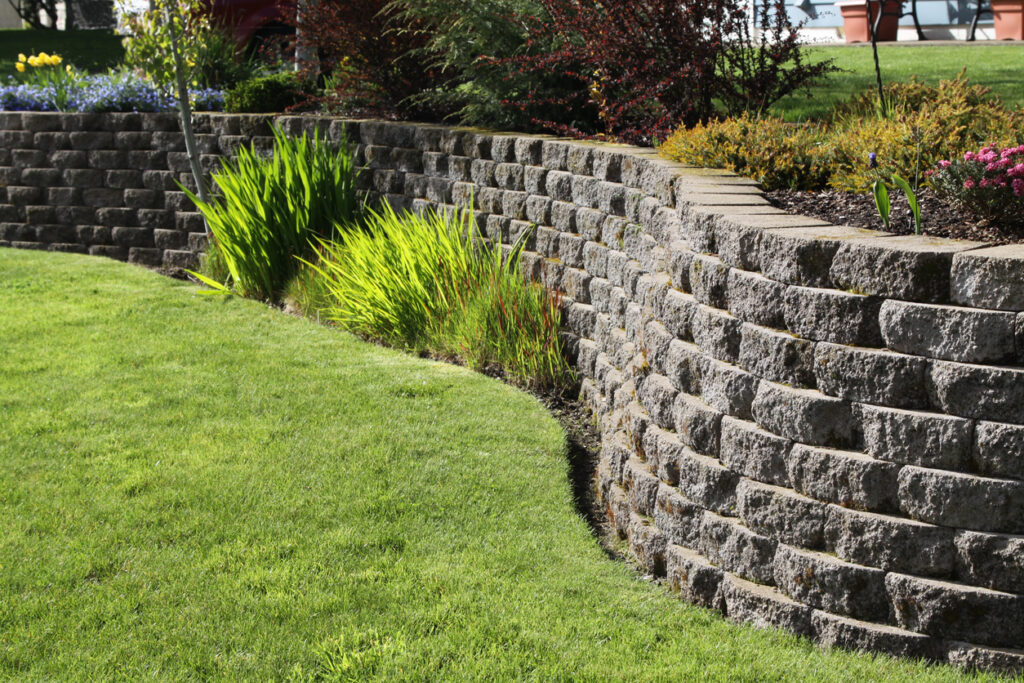
A Quick Guide To Laying Retaining Wall Blocks
You take great pride in your home, and your yard is no exception. If you want new ways to create a beautiful landscape, why not consider adding retaining wall blocks? Retaining walls not only balance your lawn and create beauty but also prevent run-off water and erosion from creating problems for your grass or home.
Before You Begin
Before laying your retaining wall, there are things to consider. To start, you'll likely need a building permit and be required to follow careful regulations set by your city. Think about the structural considerations as well. Are you simply blocking water, or do you want a wall that creates privacy and keeps your children safe? These factors will determine what materials you use and whether you use mulch, soil, or another material around the wall.
Building the Retaining Wall
Building the retaining wall requires a long list of materials.
- 2- to 4-Foot Level
- Eye Protection
- Flat Shovel
- Hearing Protectors
- Masonry Chisel
- Retaining Wall Blocks
- Sand or Gravel
- Small Sledgehammer
- Tape Measure
- Work Gloves
First, you must level the ground where the retaining wall blocks will be. Then, you need to set the base. Only after that's complete can you set the first block. After completing the first course of blocks, you can continue by laying the second course, third course, and so on. Once complete, check each tier to ensure they're level. Finally, fill in behind the wall with your sand or gravel.
Benefits of Hiring a Professional
There are many benefits to hiring a professional. Whether you have a large-scale project or want something simple and made of natural stone, a professional has the tools, knowledge, and experience necessary to do the job right the first time. This way, you save time, avoid spending money you don't need to spend on the project and get a beautifully finished landscape design.
Schedule an Appointment Today
Are you ready to build your freestanding walls for your landscape design? Let Building Products Corp help. We work on various projects, from quarried stone to concrete wall block options. Our retaining block system is easy to install and always looks beautiful. Contact us today to start your stacked stone garden wall!
